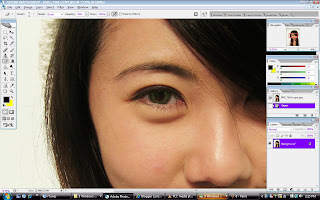
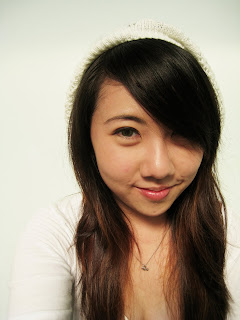
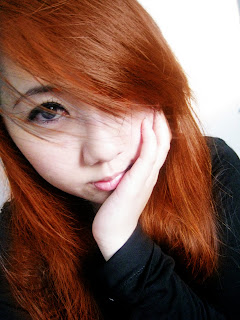
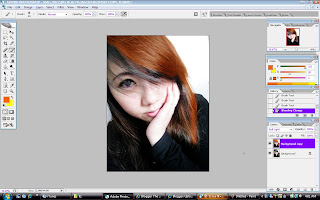
 Before closeup
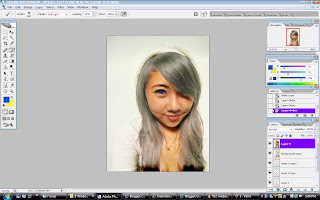
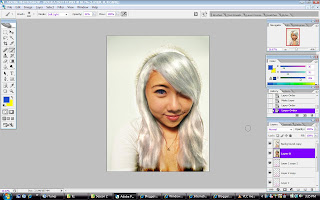
So here was where we left off after making her hair silver/white. I had already coloured the eye blue in there. I'm using Photoshop CS2.
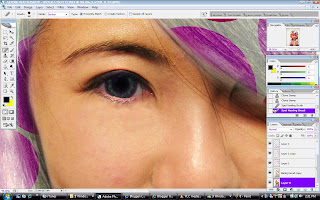
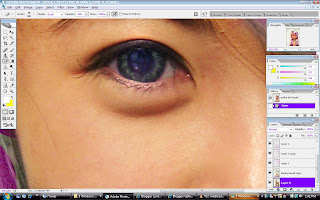 Now firstly for the eye I used the dodge tool, set it to 17% exposure and range to Highlight. Then I used a brush the same size as the Iris and highlighted it a few times till it became light enough for thee blue to cover it. Then I chose a nice blur, set the colour opacity to 36% and the blending options to darken and I coloured the eye in. Now zooming in youcan see the blue tinge and that looks ery unnatural. We're gonna cover that darker part up with black.
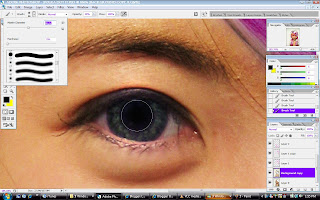
Now firstly for the eye I used the dodge tool, set it to 17% exposure and range to Highlight. Then I used a brush the same size as the Iris and highlighted it a few times till it became light enough for thee blue to cover it. Then I chose a nice blur, set the colour opacity to 36% and the blending options to darken and I coloured the eye in. Now zooming in youcan see the blue tinge and that looks ery unnatural. We're gonna cover that darker part up with black. Use a brush size that covers only the darker area and paint it black. Use a 20% opacity to gradually cover it up. It's always safer to put on light layers first. This part is optionl but I also then used bit of yellow to go around the colored part of the eye to bring out the green some more. Now we've got a sky and ocean combined colour. The eyes already look slightly bigger and brighter however if you want to make it bigger you can always use the liquify tool under Filter. Select the bloat tool, adjust brush size to slightly bigger than the eye and bloat it to as big as you want it to be.
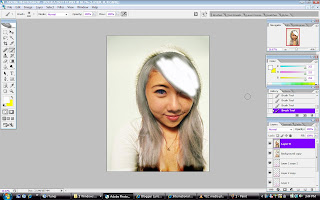
So next we are going to get rid of the puffyness underneath the eye. This is the most fun. Use the spot heling tool and set it to replace and just go over the part you want to hide. You may find that someties the skincoloour doesn't blend but that's ok justgo over it again until you do, or you can use the clone stamp tool to select the area you would like to literally "clone". Then use it over the un even skin colour to blend it in. Also you can use the spot healing tool an adjust the mode to darken or lighten parts. 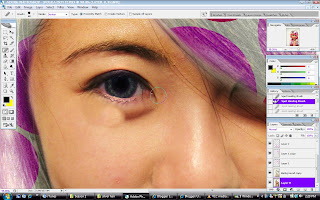
This is my result after a combination of "replace" and "darken" spot healing tool and the clone stamp tool.
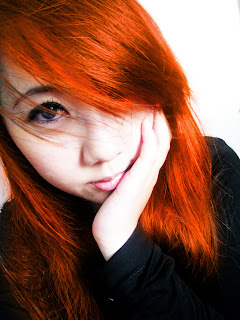
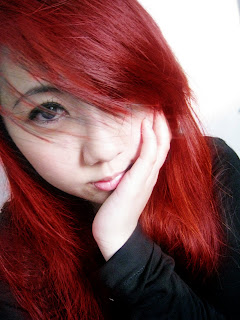
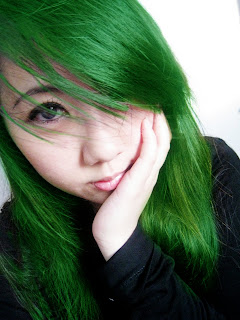
So here's the befores and after results


