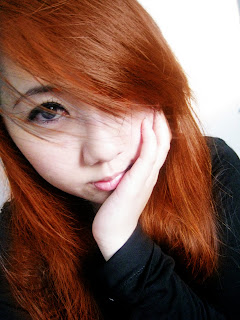
 Started out with me chatting to my bestie Lizzie and we somehow got this point where she sent me two photos and asked me to make her hair red/ bright. Then she went off for dinner. Here's the original photo. Isn't she just so cute?!
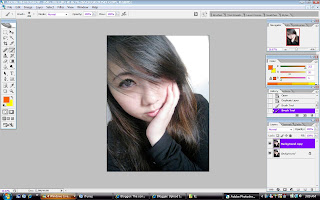
Firstly we start of by getting the photo onto photoshop. I'm using CS2. Make a copy of the background layer by right clicking "Background" and selecting "duplicate Layer". This is the layer you will be working on. (I'm really suppose to be sleeping/studying). Set your brush to "normal" and opacity to 100%. Then choose the brush tool and select your colour. It's better to choose a brush with a softer circumference. The size depends on you, larger brush would cover the larger parts quicker. Smaller sizes for those few strands of hair covering the eyes.
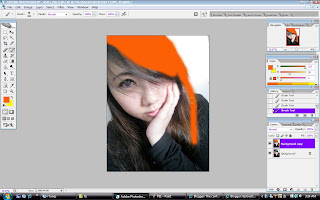
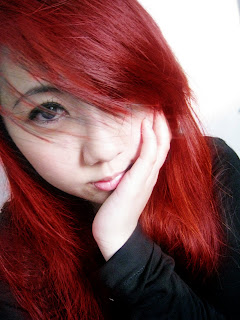
This part may seem intimidating but don't be afraid. Use your brush and cover the entire hair area or parts of it if you want to do streaks. There's no need to change your colours. Once you've finished with that on the right bottom corner where it says "Layers" you will see a white bar, that's your "Blending options". Choose "soft light" and your result should be as the picture after this.
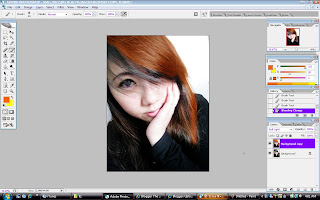
You can play with the blending options to alter the results you get. Soft Light gives a more natural result while "Color" would give a more vibrant rockstar poster effect. Reminds you of Hayley Williams, no?
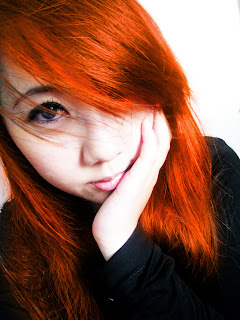
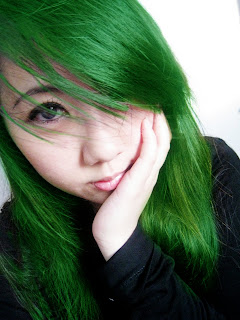
Play with colours as well! Here's a red because she requested, and a green just for laughs.

Your articles are inventive. I am looking forward to reading the plethora of articles that you have linked here. Thumbs up! SherrysLife
ReplyDelete